How to install and configure WooCommerce Shipping & Tax plugin
The WooCommerce Shipping & Tax plugin automates tax calculation based on shipping zone as well as shipping label printing. This article will walk you through installing and configuring the WooCommerce Shipping & Tax plugin to calculate shipping costs and create shipping labels for WordPress powered websites.
Installing Configuring WooCommerce Shipping & Tax in WordPress
To configure and use WooCommerce Shipping Extension in your WordPress website, follow these steps:
- Log in to your WordPress site with an administrator account.
- On the Dashboard in the left sidebar, click Plugins, and then click Add New:
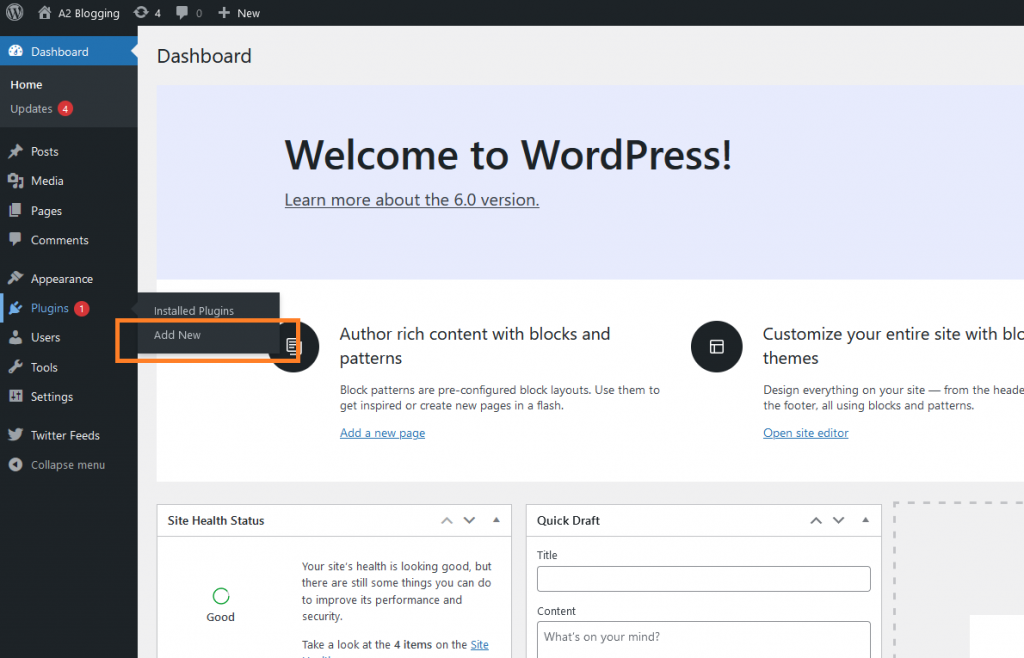
Search for “WooCommerce Shipping & Tax” and then install and activate the WooCommerce Shipping & Tax Plugin:
 Alternatively, you can download it from here.
On the Dashboard in the left sidebar, click , and then click Settings:
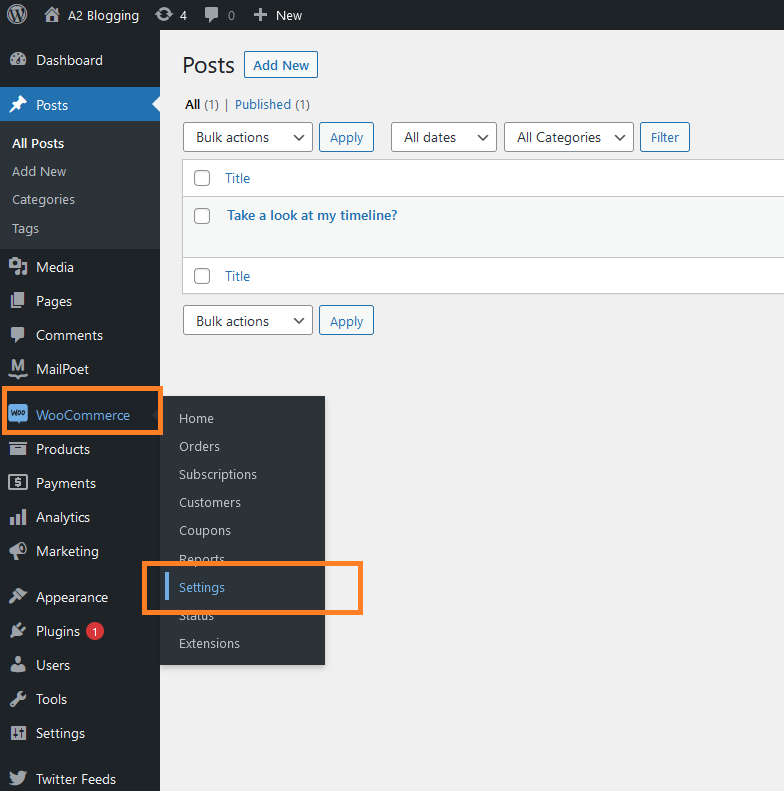
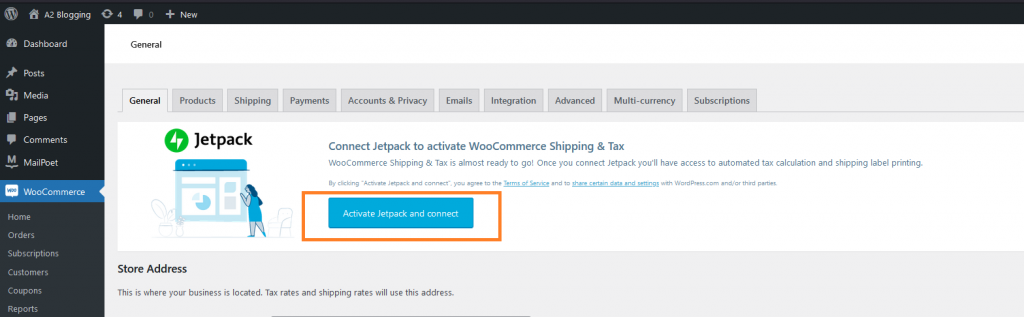
Activate JetPack if has not been activated:
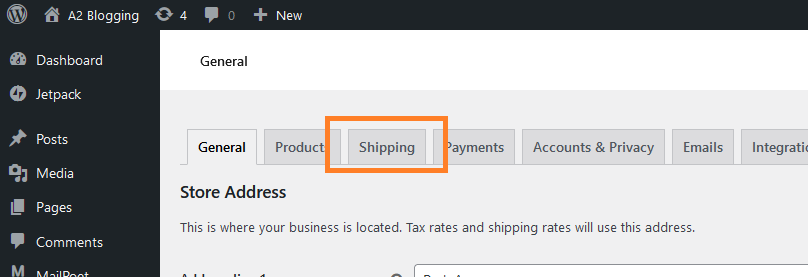
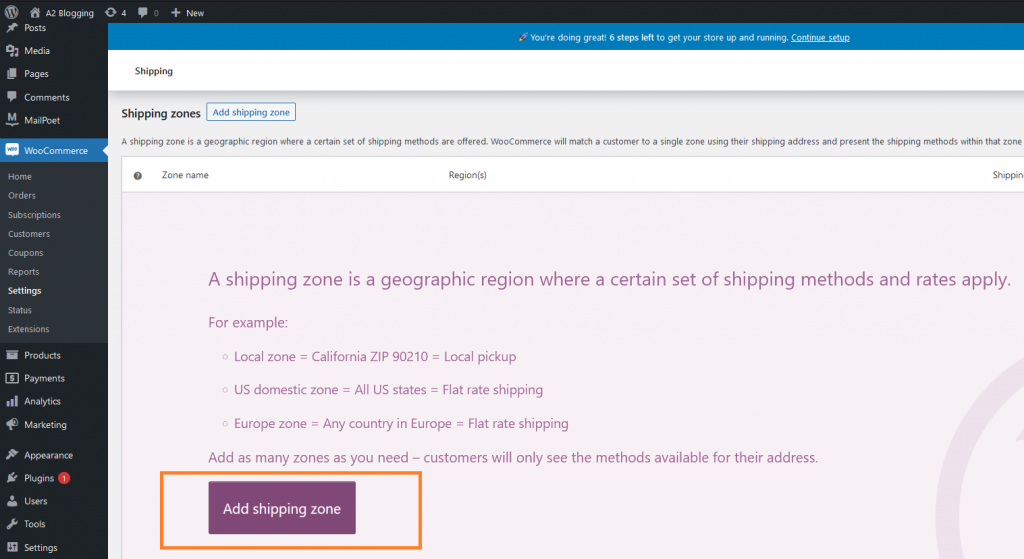
Click on the Shipping tab:
- Click on the Add Shipping Zone button to set up how much will it cost to send a product to an specific area/region:
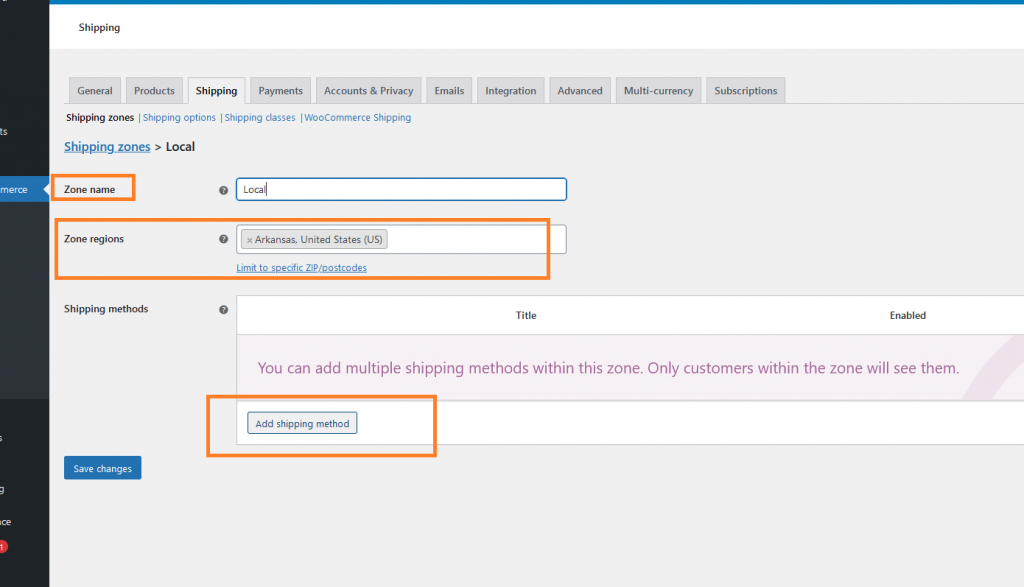
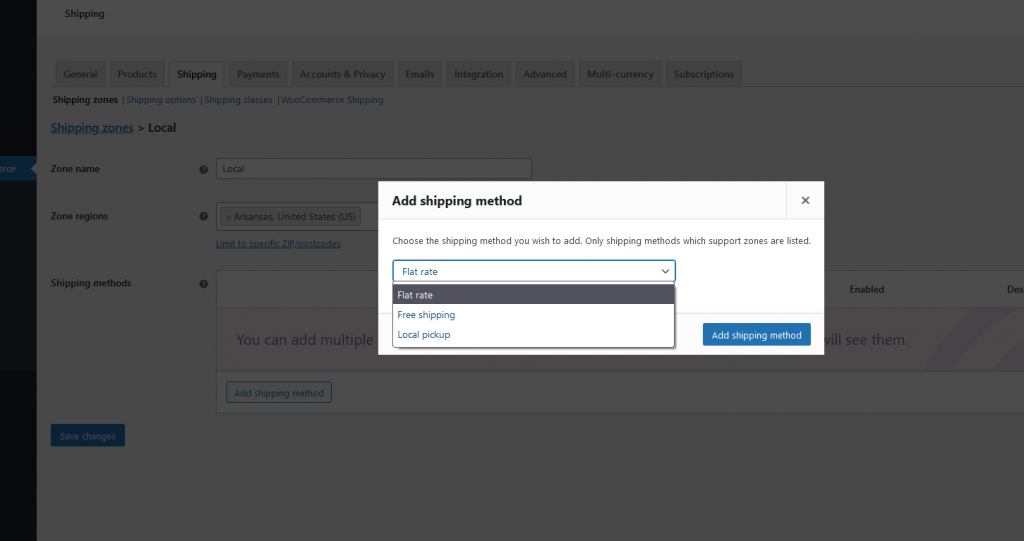
Enter the name of the zone, coverage area, and the shipping method which could be any of the following:
- Flat rate
- Free shipping
- Local pickup
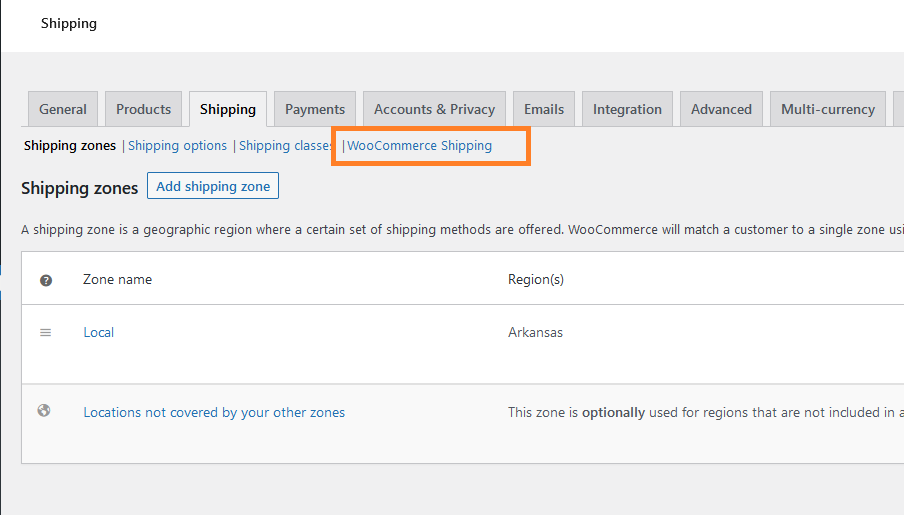
To print shipping labels, click on WooCommerce Shipping:
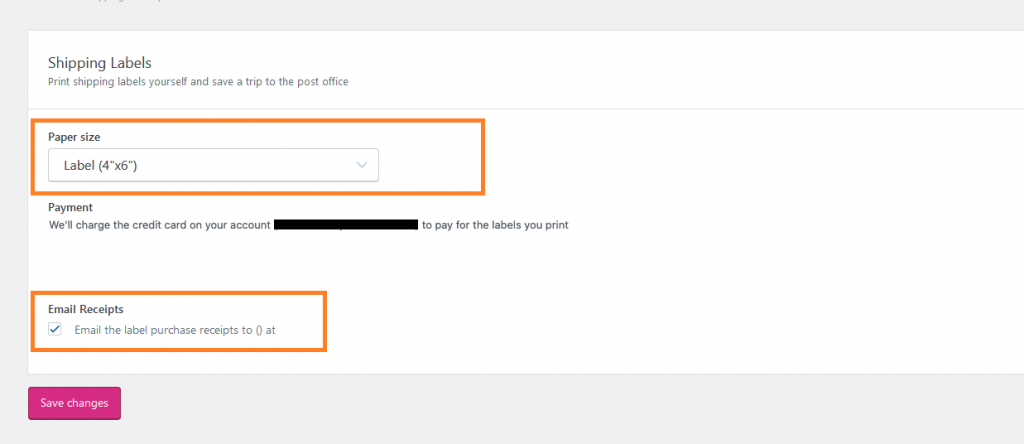
Select a label size, and the payment method for the shipping label and click Save changes:
- Easily open any order and print the shipping label and send the product to the customer after this configuration.
More Information
For more information about WooCommerce, please visit: https://www.a2hosting.com/kb/installable-applications/optimization-and-configuration/wordpress2/wordpress-plugins/installing-and-configuring-woocommercehttps://www.a2hosting.com/kb/installable-applications/optimization-and-configuration/wordpress2/wordpress-plugins/installing-and-configuring-woocommerce
Article Details
- Product: All accounts
- Level: Beginner
Grow Your Web Business
Subscribe to receive weekly cutting edge tips, strategies, and news you need to grow your web business.
No charge. Unsubscribe anytime.
Did you find this article helpful? Then you'll love our support. Experience the A2 Hosting difference today and get a pre-secured, pre-optimized website. Check out our web hosting plans today.